Planning a trip to witness the Northern Lights, or Aurora Borealis, represents a significant investment in time and resources. This guide provides the practical details necessary to maximize your chances of seeing this natural phenomenon, ensuring that your travel budget and effort translate into a successful and memorable experience. Understanding the optimal conditions, prime locations, and essential preparations is critical for anyone aiming to capture the elusive glow of the aurora.
Understanding the Aurora Borealis
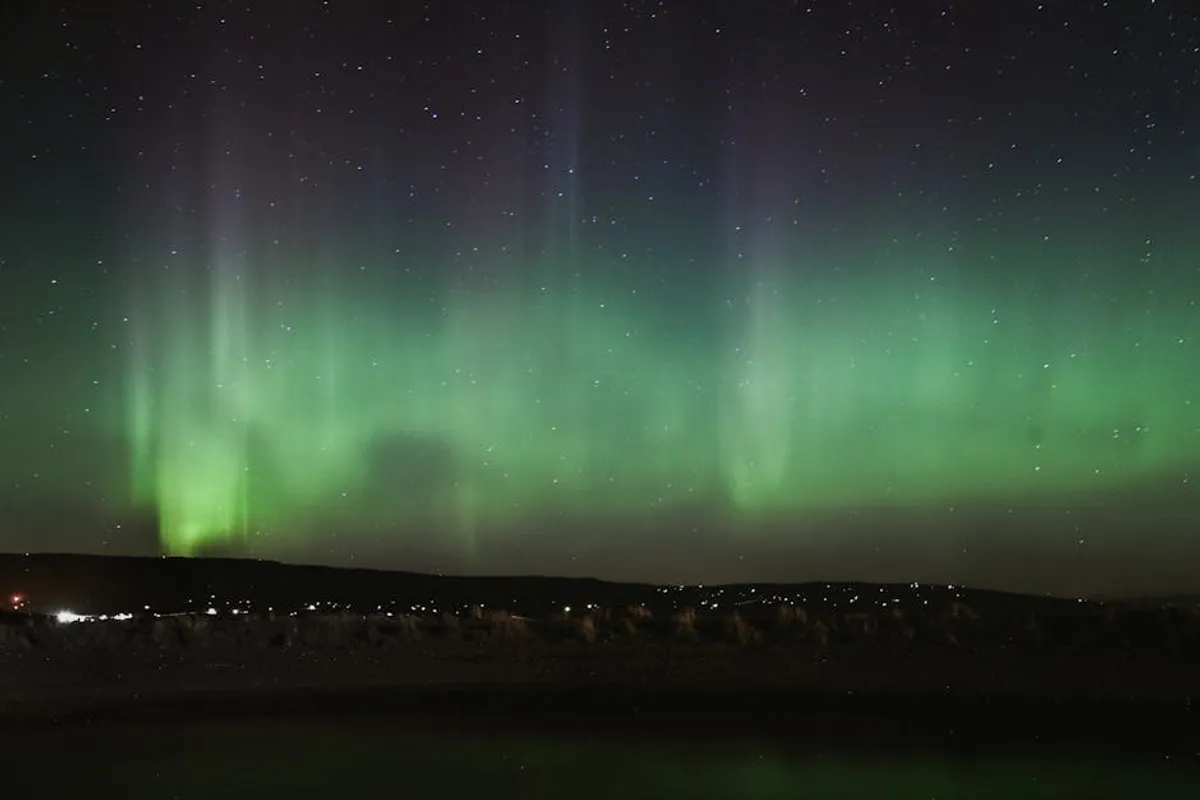
The Aurora Borealis is a celestial light show resulting from collisions between electrically charged particles from the sun that enter the Earth's atmosphere. These particles, ejected from the sun's surface during solar flares and coronal mass ejections, are guided by Earth's magnetic field towards the poles. When they interact with atmospheric gases, they emit light, creating the vibrant displays observed in the night sky.
The Science Behind the Spectacle
The colors of the aurora depend on the type of gas particles involved and the altitude at which they collide. Oxygen produces green and yellow light at lower altitudes (around 60 miles) and rarer red auroras at higher altitudes (up to 200 miles). Nitrogen typically yields blue or purplish-red light. The intensity of the display is measured by the Kp-index, a scale from 0 to 9, indicating geomagnetic activity. A higher Kp-index suggests a stronger, more widespread aurora.
Optimal Viewing Conditions
Successful aurora viewing hinges on three primary factors: darkness, clear skies, and geomagnetic activity. Absolute darkness, away from city light pollution, is paramount. Clear, cloudless skies are essential, as even a thin layer of cloud cover can obscure the lights. Finally, sufficient solar activity, indicated by a higher Kp-index, increases the likelihood of a visible display. Planning around these conditions is more effective than relying solely on geographical location.
Prime Locations for Aurora Chasing
While the aurora can be seen anywhere within the 'aurora oval' – a band around the magnetic poles – certain regions offer more consistent and accessible viewing opportunities due to their latitude and infrastructure.
Scandinavia: Norway, Sweden, Finland
This region is a perennial favorite, particularly the areas above the Arctic Circle.
- Norway: Tromsø, known as the 'Gateway to the Arctic,' offers frequent tours and is relatively accessible. The Lofoten Islands provide dramatic coastal backdrops.
- Sweden: Abisko National Park is renowned for its 'Blue Hole,' a patch of sky often clear even when surrounding areas are cloudy, thanks to a microclimate.
- Finland: Lapland, with Rovaniemi and Levi, offers a blend of aurora viewing with winter activities. Glass igloos provide unique viewing accommodations.
North America: Alaska, Canada
These vast northern territories provide ample opportunities, particularly inland areas away from coastal cloud cover.
Alaska: Fairbanks is a prime location due to its position under the aurora oval and typically dry, clear winter nights. Its infrastructure supports aurora tourism effectively.
Canada: Yellowknife in the Northwest Territories is often cited as one of the best places globally, boasting over 240 aurora viewing nights per year. Yukon Territory, particularly Whitehorse, also offers excellent prospects.
Other Notable Regions: Iceland, Greenland, Russia
Iceland: The entire country lies within the aurora oval, making it a popular choice due to its accessibility from Europe and North America. Reykjavik offers tours, but escaping city lights is crucial for optimal viewing.
Greenland: Kangerlussuaq is a top spot, with its stable climate and minimal light pollution. However, travel here is generally more logistically complex and costly.
Russia: The Kola Peninsula, particularly Murmansk, is a less-traveled but viable option for aurora viewing, though it requires more intricate travel planning.
Best Time to Witness the Lights
Timing is critical. Understanding both the seasonal and daily patterns significantly boosts your chances.
Seasonal Considerations: Autumn to Spring
The aurora season generally runs from late August to April. The darkest months, typically December to February, offer the longest periods of darkness, increasing viewing time. However, clear skies can be less frequent due to winter weather. September to October and March to April often present a balance of dark nights and potentially milder, clearer weather. The equinoxes (September and March) are sometimes associated with increased geomagnetic activity.
Daily Timing: Dark Hours and KP-Index
The aurora is typically most active between 10 PM and 2 AM local time, though displays can occur any time during dark hours. Monitoring the Kp-index forecast is essential. Many apps and websites provide real-time Kp-index data and short-term forecasts, allowing for last-minute adjustments to your viewing plans. Aim for nights with a Kp-index of 3 or higher for a good chance of a visible display.
Essential Gear and Preparation
Being prepared for cold weather and equipped for photography are non-negotiable for a successful aurora trip.
Clothing Layers for Extreme Cold
Temperatures in aurora regions can drop significantly, often well below freezing. Layering is key:
- Base Layer: Moisture-wicking thermal underwear (merino wool or synthetic).
- Mid-Layers: Fleece or down jackets for insulation.
- Outer Layer: Waterproof and windproof parka and pants, rated for extreme cold.
- Extremities: Insulated, waterproof boots (one size up for thick socks), wool socks, thermal gloves or mittens, hat covering ears, and a neck gaiter or balaclava.
Pro Tip: Chemical hand and foot warmers are inexpensive and can provide hours of additional comfort during long waits in sub-zero temperatures.
Photography Equipment and Settings
Capturing the aurora requires specific camera gear and settings:
Camera: DSLR or mirrorless camera with manual settings capability.
Lens: Wide-angle lens (14-24mm) with a fast aperture (f/2.8 or wider) is ideal for gathering light.
Tripod: Essential for long exposures to prevent camera shake.
Remote Shutter Release: Prevents camera movement when pressing the shutter button.
Extra Batteries: Cold temperatures drain batteries quickly; keep spares warm in an inside pocket.
Settings:
- Manual Mode (M): Full control over exposure.
- ISO: Start at 800-1600, adjust up to 3200-6400 for fainter aurora.
- Aperture: Widest possible (e.g., f/2.8, f/4).
- Shutter Speed: 5-20 seconds, depending on aurora brightness and movement. Shorter for brighter, faster-moving aurora; longer for fainter, slower displays.
- Focus: Manual focus set to infinity.
- White Balance: Auto or Tungsten/Fluorescent for cooler tones.
Accommodation and Transportation Logistics
Book accommodations and transportation well in advance, especially during peak aurora season. Consider options outside major towns to minimize light pollution. Rental cars offer flexibility for chasing clear skies, but ensure they are equipped for winter driving (e.g., studded tires). Many tour operators offer guided aurora hunts, providing transport and local expertise.
Warning: Never chase the aurora without adequate winter driving experience and a vehicle properly equipped for icy or snowy conditions. Roads can be treacherous, and cellular service may be unreliable in remote areas.
Maximizing Your Viewing Opportunity
Beyond preparation, proactive strategies significantly increase your chances of a successful viewing.
Aurora Forecasts and Apps
Utilize dedicated aurora forecast websites and mobile applications. These tools provide Kp-index predictions, cloud cover maps, and even real-time alerts. Checking these regularly, sometimes hourly, allows for dynamic adjustments to your plans, such as relocating to a clearer spot or deciding to venture out on short notice.
Guided Tours vs. Self-Guided Exploration
Guided Tours: Best for first-timers or those uncomfortable with winter driving. Operators often have local knowledge of optimal viewing spots, provide warm gear, hot drinks, and sometimes photography assistance. They adapt to weather conditions, driving to clearer areas.
Self-Guided: Offers maximum flexibility and cost savings. Requires personal vehicle, navigation skills, and confidence in cold-weather conditions. This option suits experienced travelers and photographers who prefer independence.
Patience and Persistence
The aurora is a natural phenomenon, inherently unpredictable. Be prepared for long waits in the cold, and accept that some nights may yield no visible display. Plan multiple nights for aurora chasing to increase your odds. A flexible itinerary that allows for spontaneous pursuit is often the most rewarding approach.
Planning Your Journey
A successful Northern Lights trip requires meticulous planning, from flight bookings to local arrangements. Secure flights and accommodations several months in advance, especially for popular destinations during peak season. Research local transport options and consider purchasing travel insurance that covers extreme weather delays or cancellations. Pack for severe cold, and allow for flexibility in your schedule to account for weather conditions. By focusing on these practical elements, you enhance the commercial value of your trip, turning a significant expenditure into a high-probability success.
Frequently Asked Questions
What is the best month to see the Northern Lights?
While the aurora can appear from late August to April, the darkest months of December, January, and February offer the longest viewing windows. However, September/October and March/April often have a good balance of darkness and potentially clearer skies.
How long do the Northern Lights last?
Aurora displays can range from a few minutes to several hours. Intensity and duration vary greatly depending on solar activity and atmospheric conditions.
Do I need a special camera to photograph the aurora?
A DSLR or mirrorless camera with manual settings, a wide-angle lens (f/2.8 or wider), and a sturdy tripod are highly recommended for capturing quality aurora photographs. Smartphones typically struggle in low light conditions.
Can I see the Northern Lights with my naked eye?
Yes, if the display is strong and conditions are dark and clear, the aurora is visible to the naked eye. Fainter displays might appear as a grayish glow, but brighter ones will show distinct colors and movement.